Integrate Anymail Finder with n8n
This guide walks you through connecting Anymail Finder with n8n so you can automatically find and verify email addresses inside your workflows.
By the end of this guide, you'll know how to:
- Install the Anymail Finder community node
- Connect your Anymail Finder account using an API key
- Add the node to a workflow
- Choose the right action for your use case
- Handle and filter results effectively
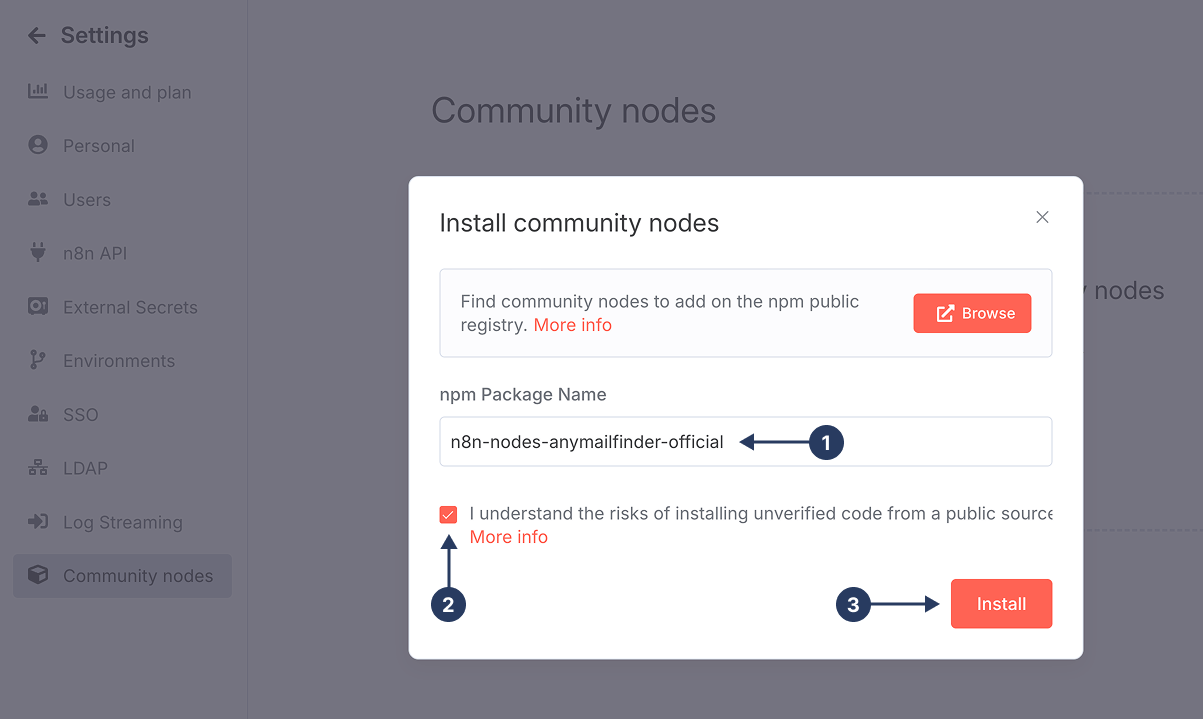
1. Install the Anymail Finder node
First, you need to install the official Anymail Finder community node in n8n.
- In n8n, go to Settings → Community Nodes
- Click Install
- In the Package name field, enter
n8n-nodes-anymailfinder-official - Click Install again and wait for the process to complete
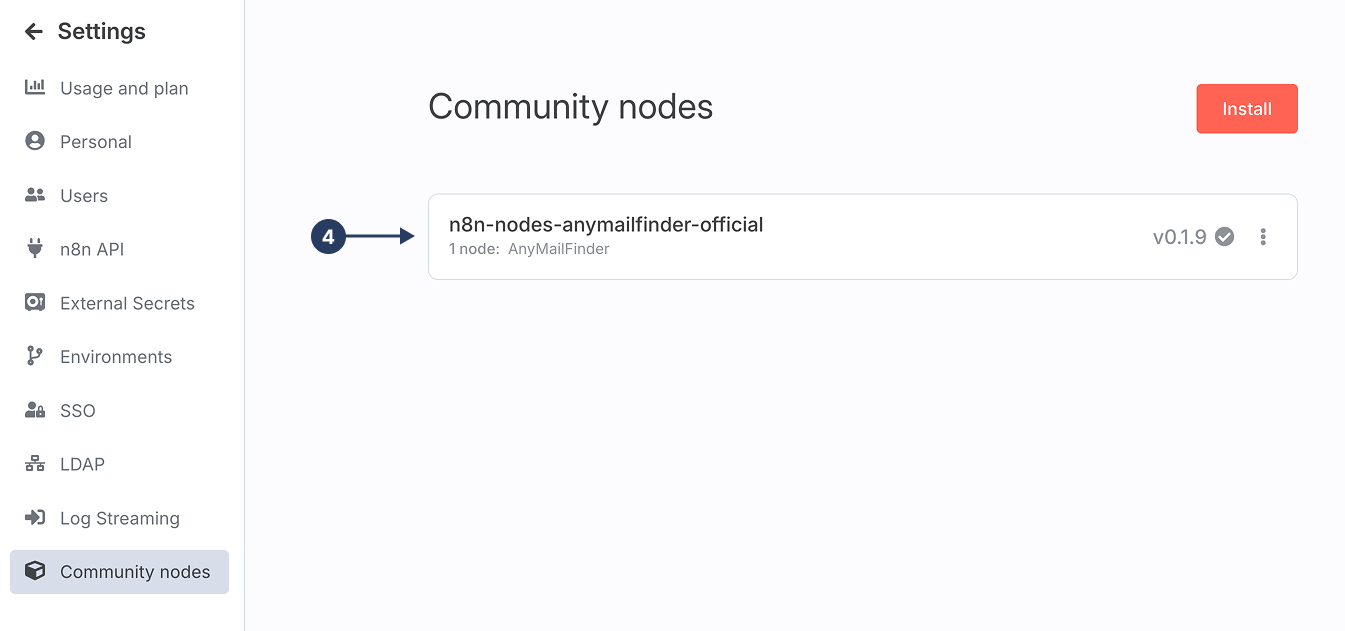
Once installed, Anymail Finder will appear in your list of available nodes and can be added to any workflow.
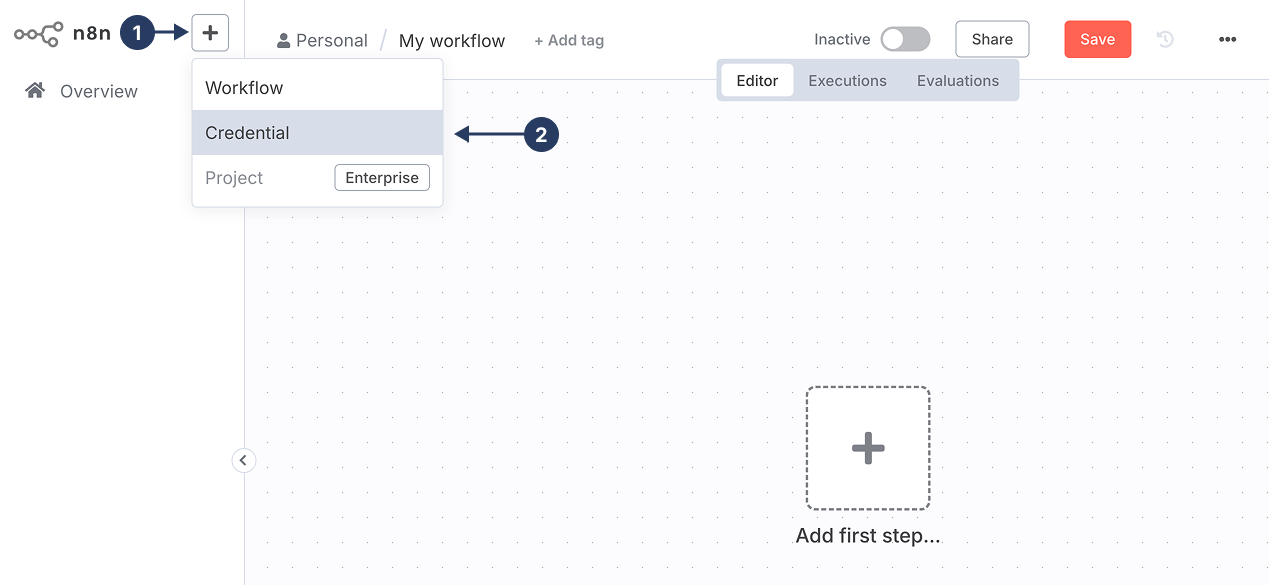
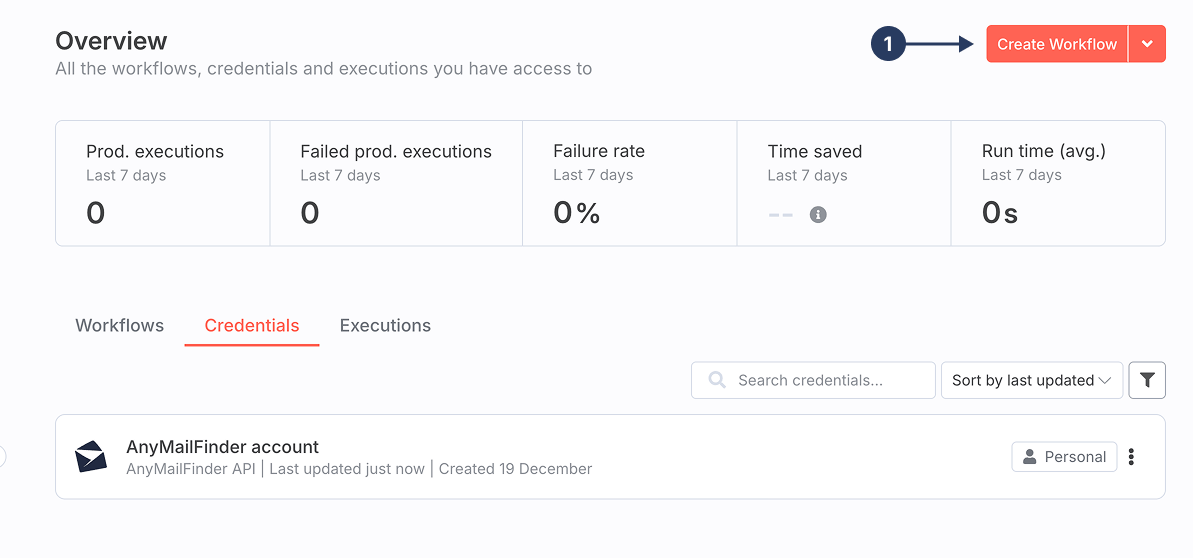
2. Connect your Anymail Finder account
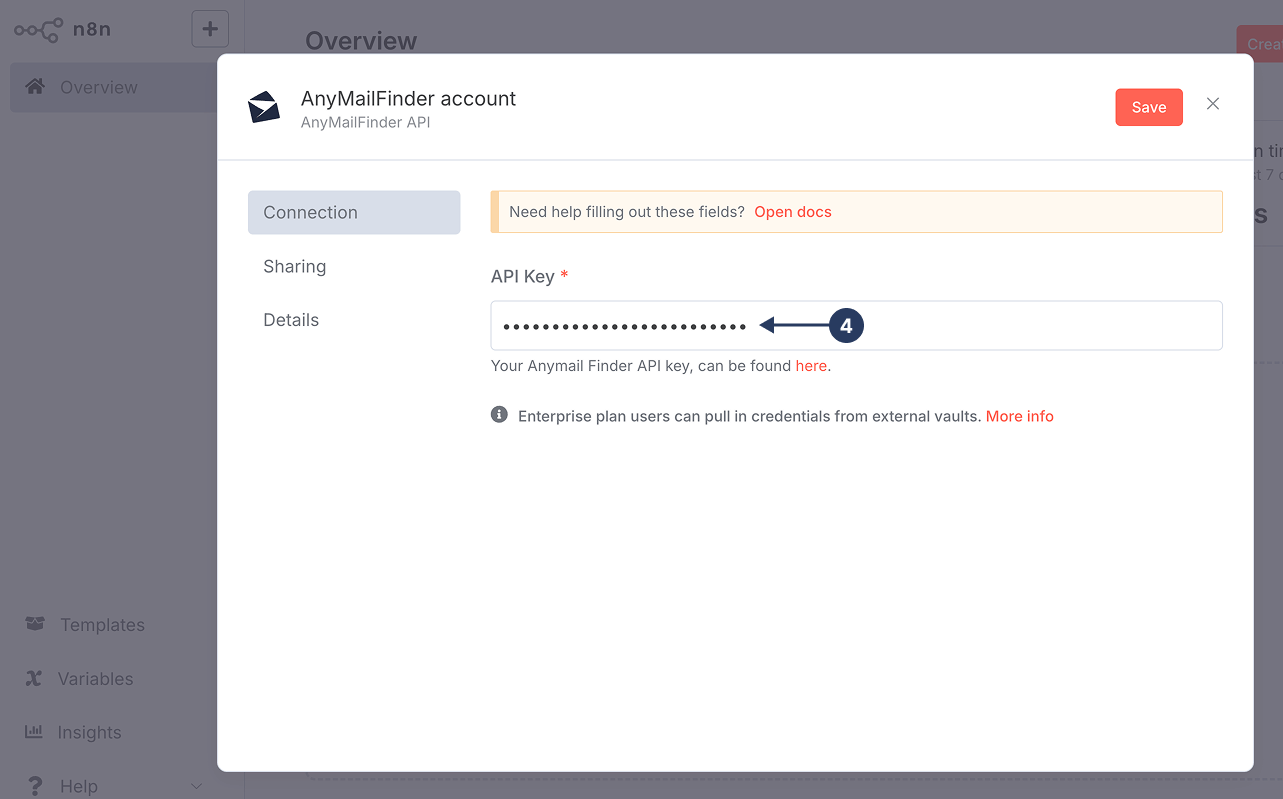
Next, connect n8n to your Anymail Finder account using an API key.
- In n8n, go to Credentials
- Click Create credential
- Search for Anymail Finder API and select it
- Paste your Anymail Finder API key (you can find it on the Anymail Finder API settings page)
- Click Save
Your credentials are now securely stored and can be reused across multiple workflows.

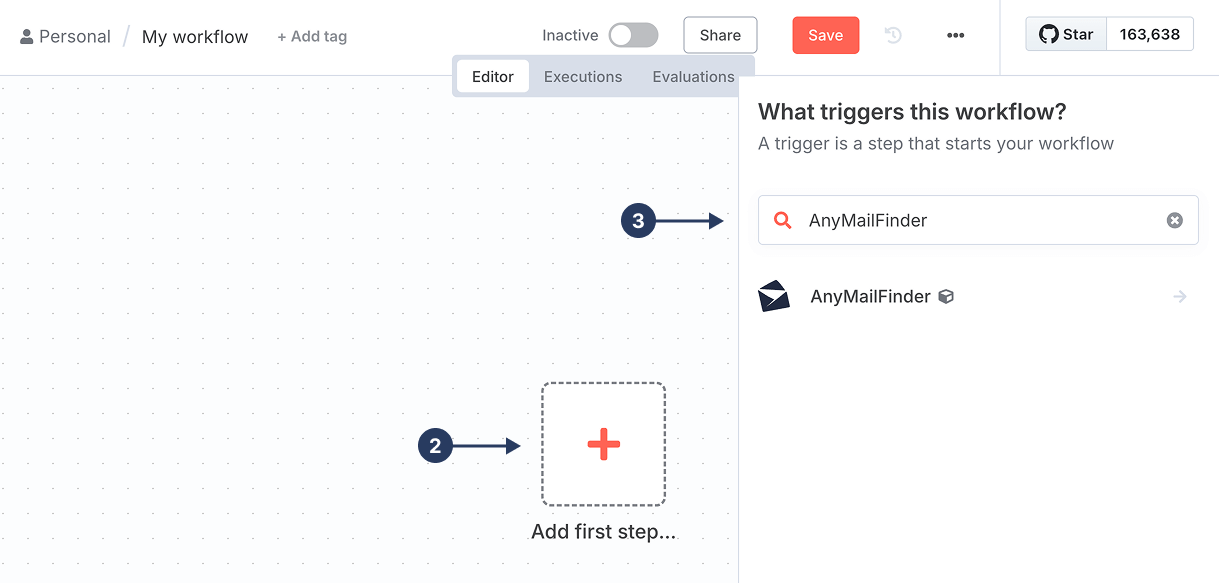
3. Add the Anymail Finder node to a workflow
Now you're ready to use Anymail Finder in a workflow.
- Create a new workflow or open an existing one
- Click the + button to add a node
- Search for Anymail Finder and select it
Every n8n workflow must start with a trigger. If you don't add one manually, n8n will automatically insert a Manual Trigger node. You can replace it later with a webhook, schedule, or another trigger.
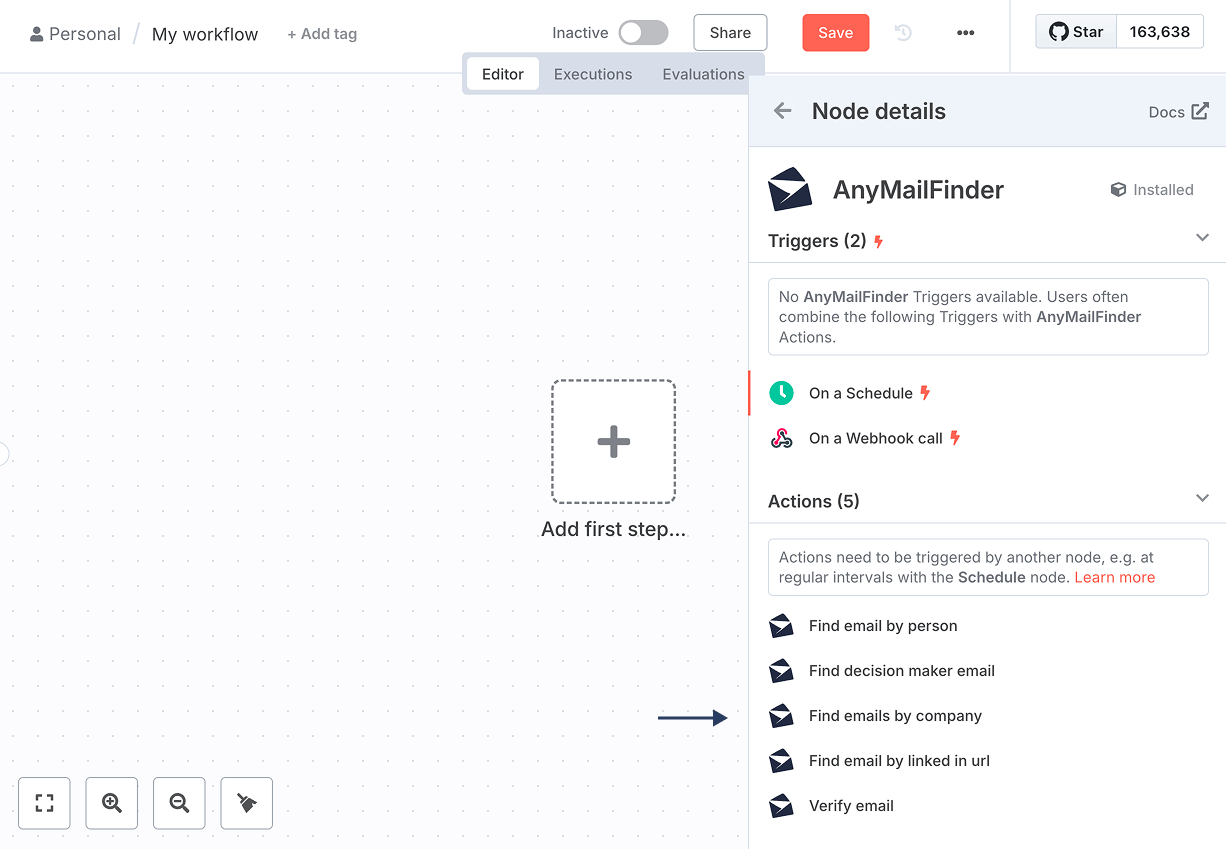
4. Choose an action
The Anymail Finder node supports several actions depending on what you want to achieve:
- Find a Person's Email (read documentation)
- Find All Emails at a Company (read documentation)
- Find Emails by LinkedIn URL (read documentation)
- Find a Decision Maker's Email (read documentation)
- Verify an Email (read documentation)
For detailed information about parameters, pricing, limits, and response formats, see the full Anymail Finder API documentation.
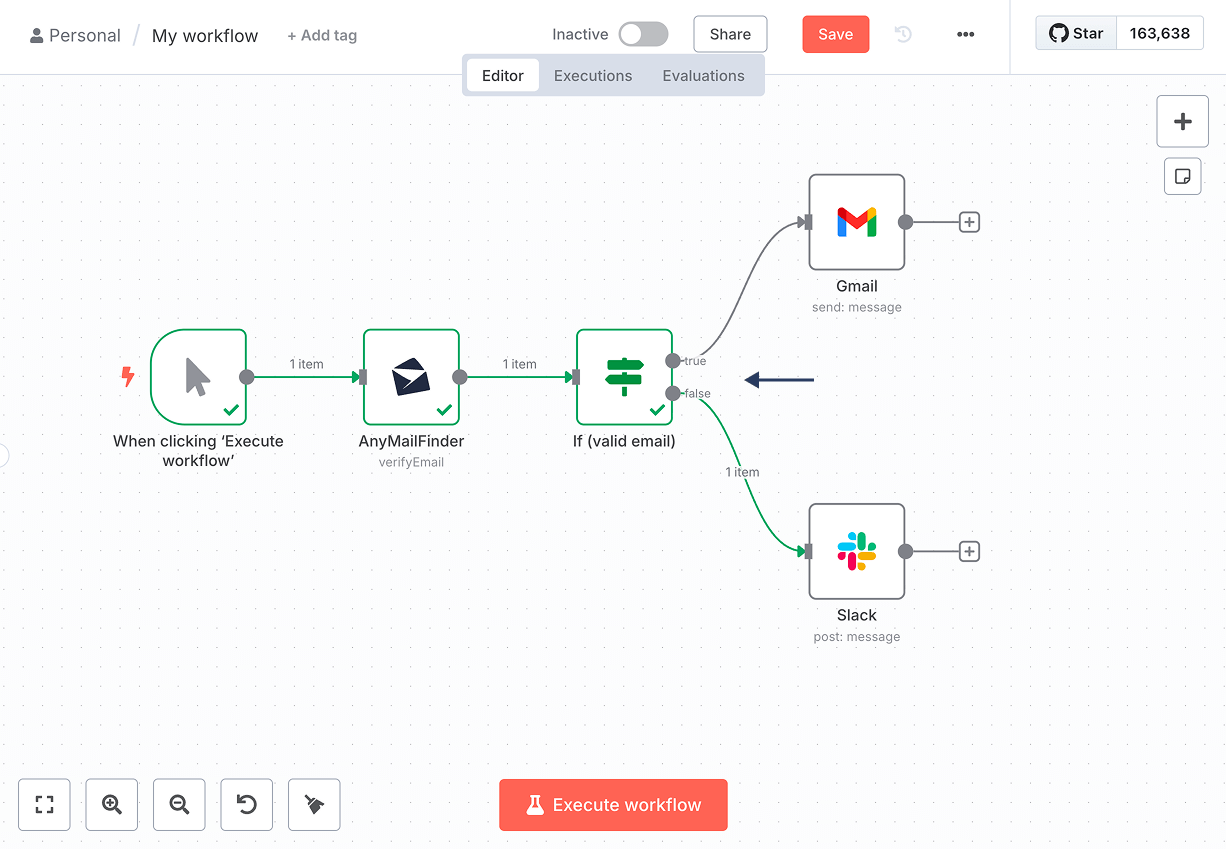
5. Handle and filter the output
All Anymail Finder actions return an email_status field that tells you how reliable the result is. Possible values include:
- valid: The email is verified and safe to use.
- risky: The email was found but could not be fully verified. It may bounce, but can still be usable depending on your risk tolerance.
- not_found (search only): No email address was found for the given input.
- invalid (verification only): The email address is not deliverable. You should exclude these to protect your sender reputation.
Best practice for most workflows:
You can use n8n's IF node to branch your workflow based on
email_status.
- Continue only with valid emails
- Optionally include risky emails if you're comfortable with some bounce risk
- Always exclude invalid emails
Need help?
If you run into any issues:
- Check the Anymail Finder API documentation
- Contact the support team via chat or by email at team@anymailfinder.com