Integrate Anymail Finder with Clay
This guide shows how to integrate Anymail Finder with Clay using the "HTTP API" tool, specifically to use our "Find a Person's Email" endpoint.
The exact same steps apply to those other endpoints, with only the endpoint URL, input fields, and output structure changed:
Step 1: Choose the "HTTP API" Tool
- Open your Clay table with the contact data you want to enrich.
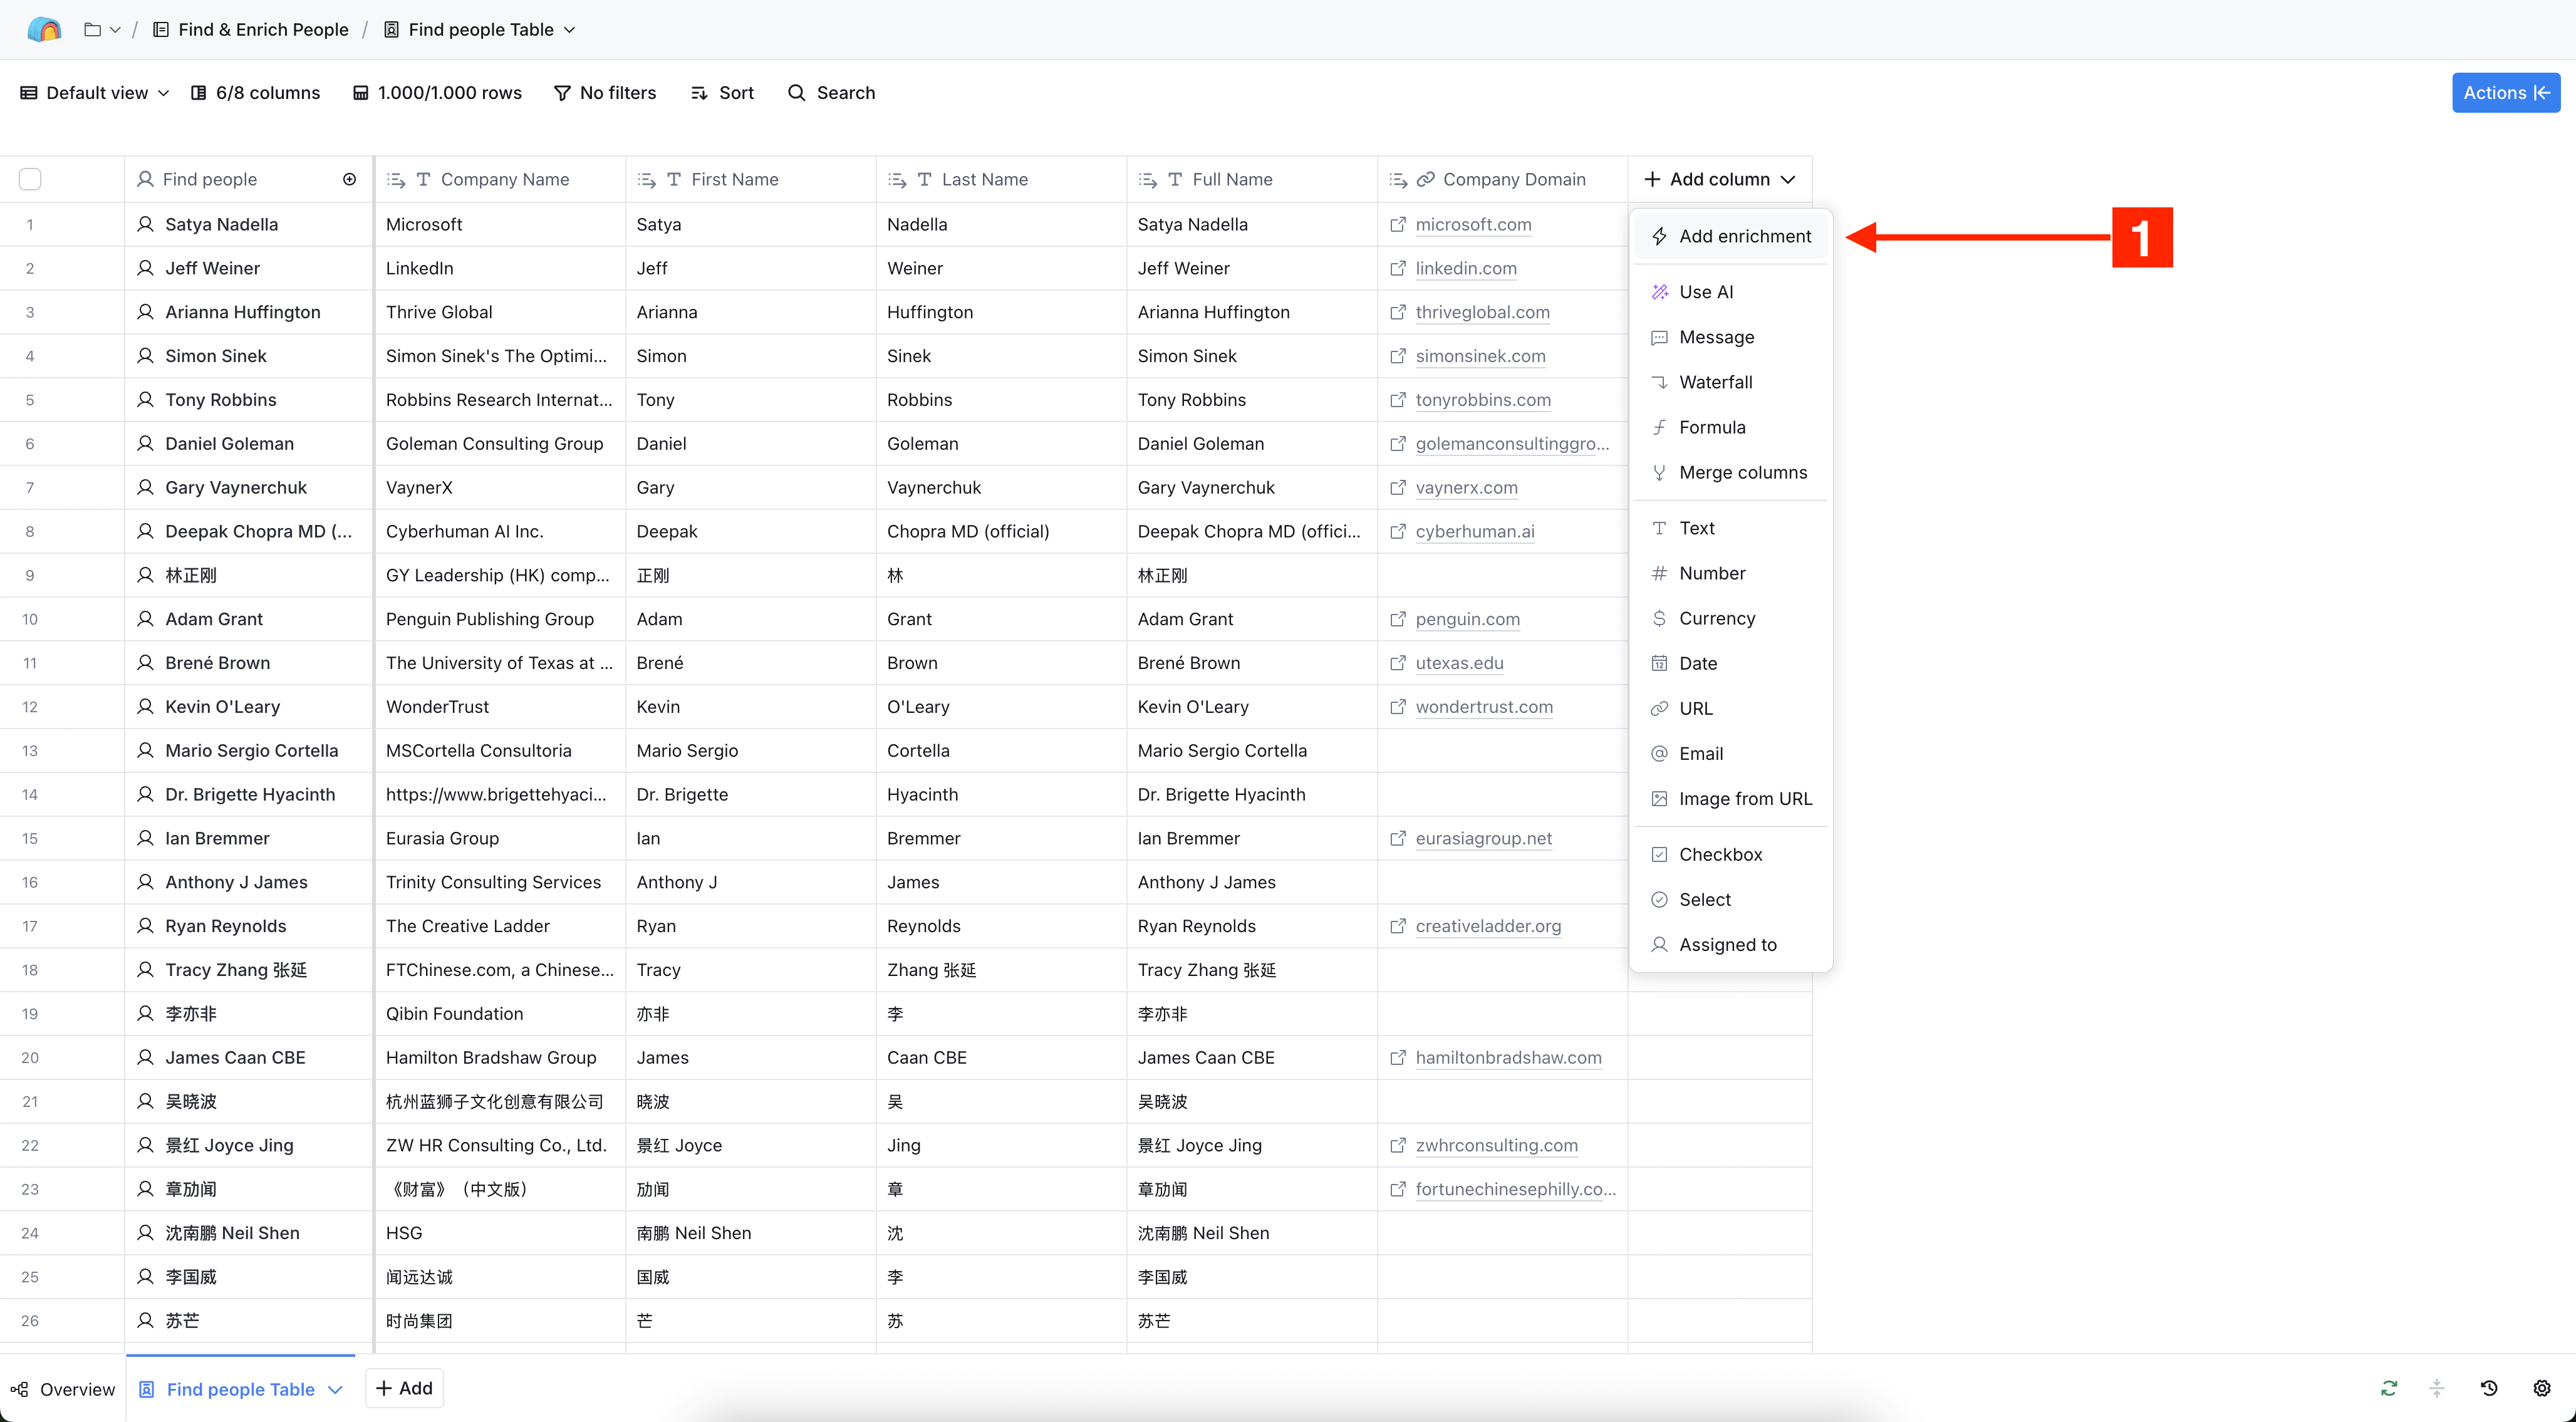
- Click "Add column" and select "Add enrichment". show screenshot
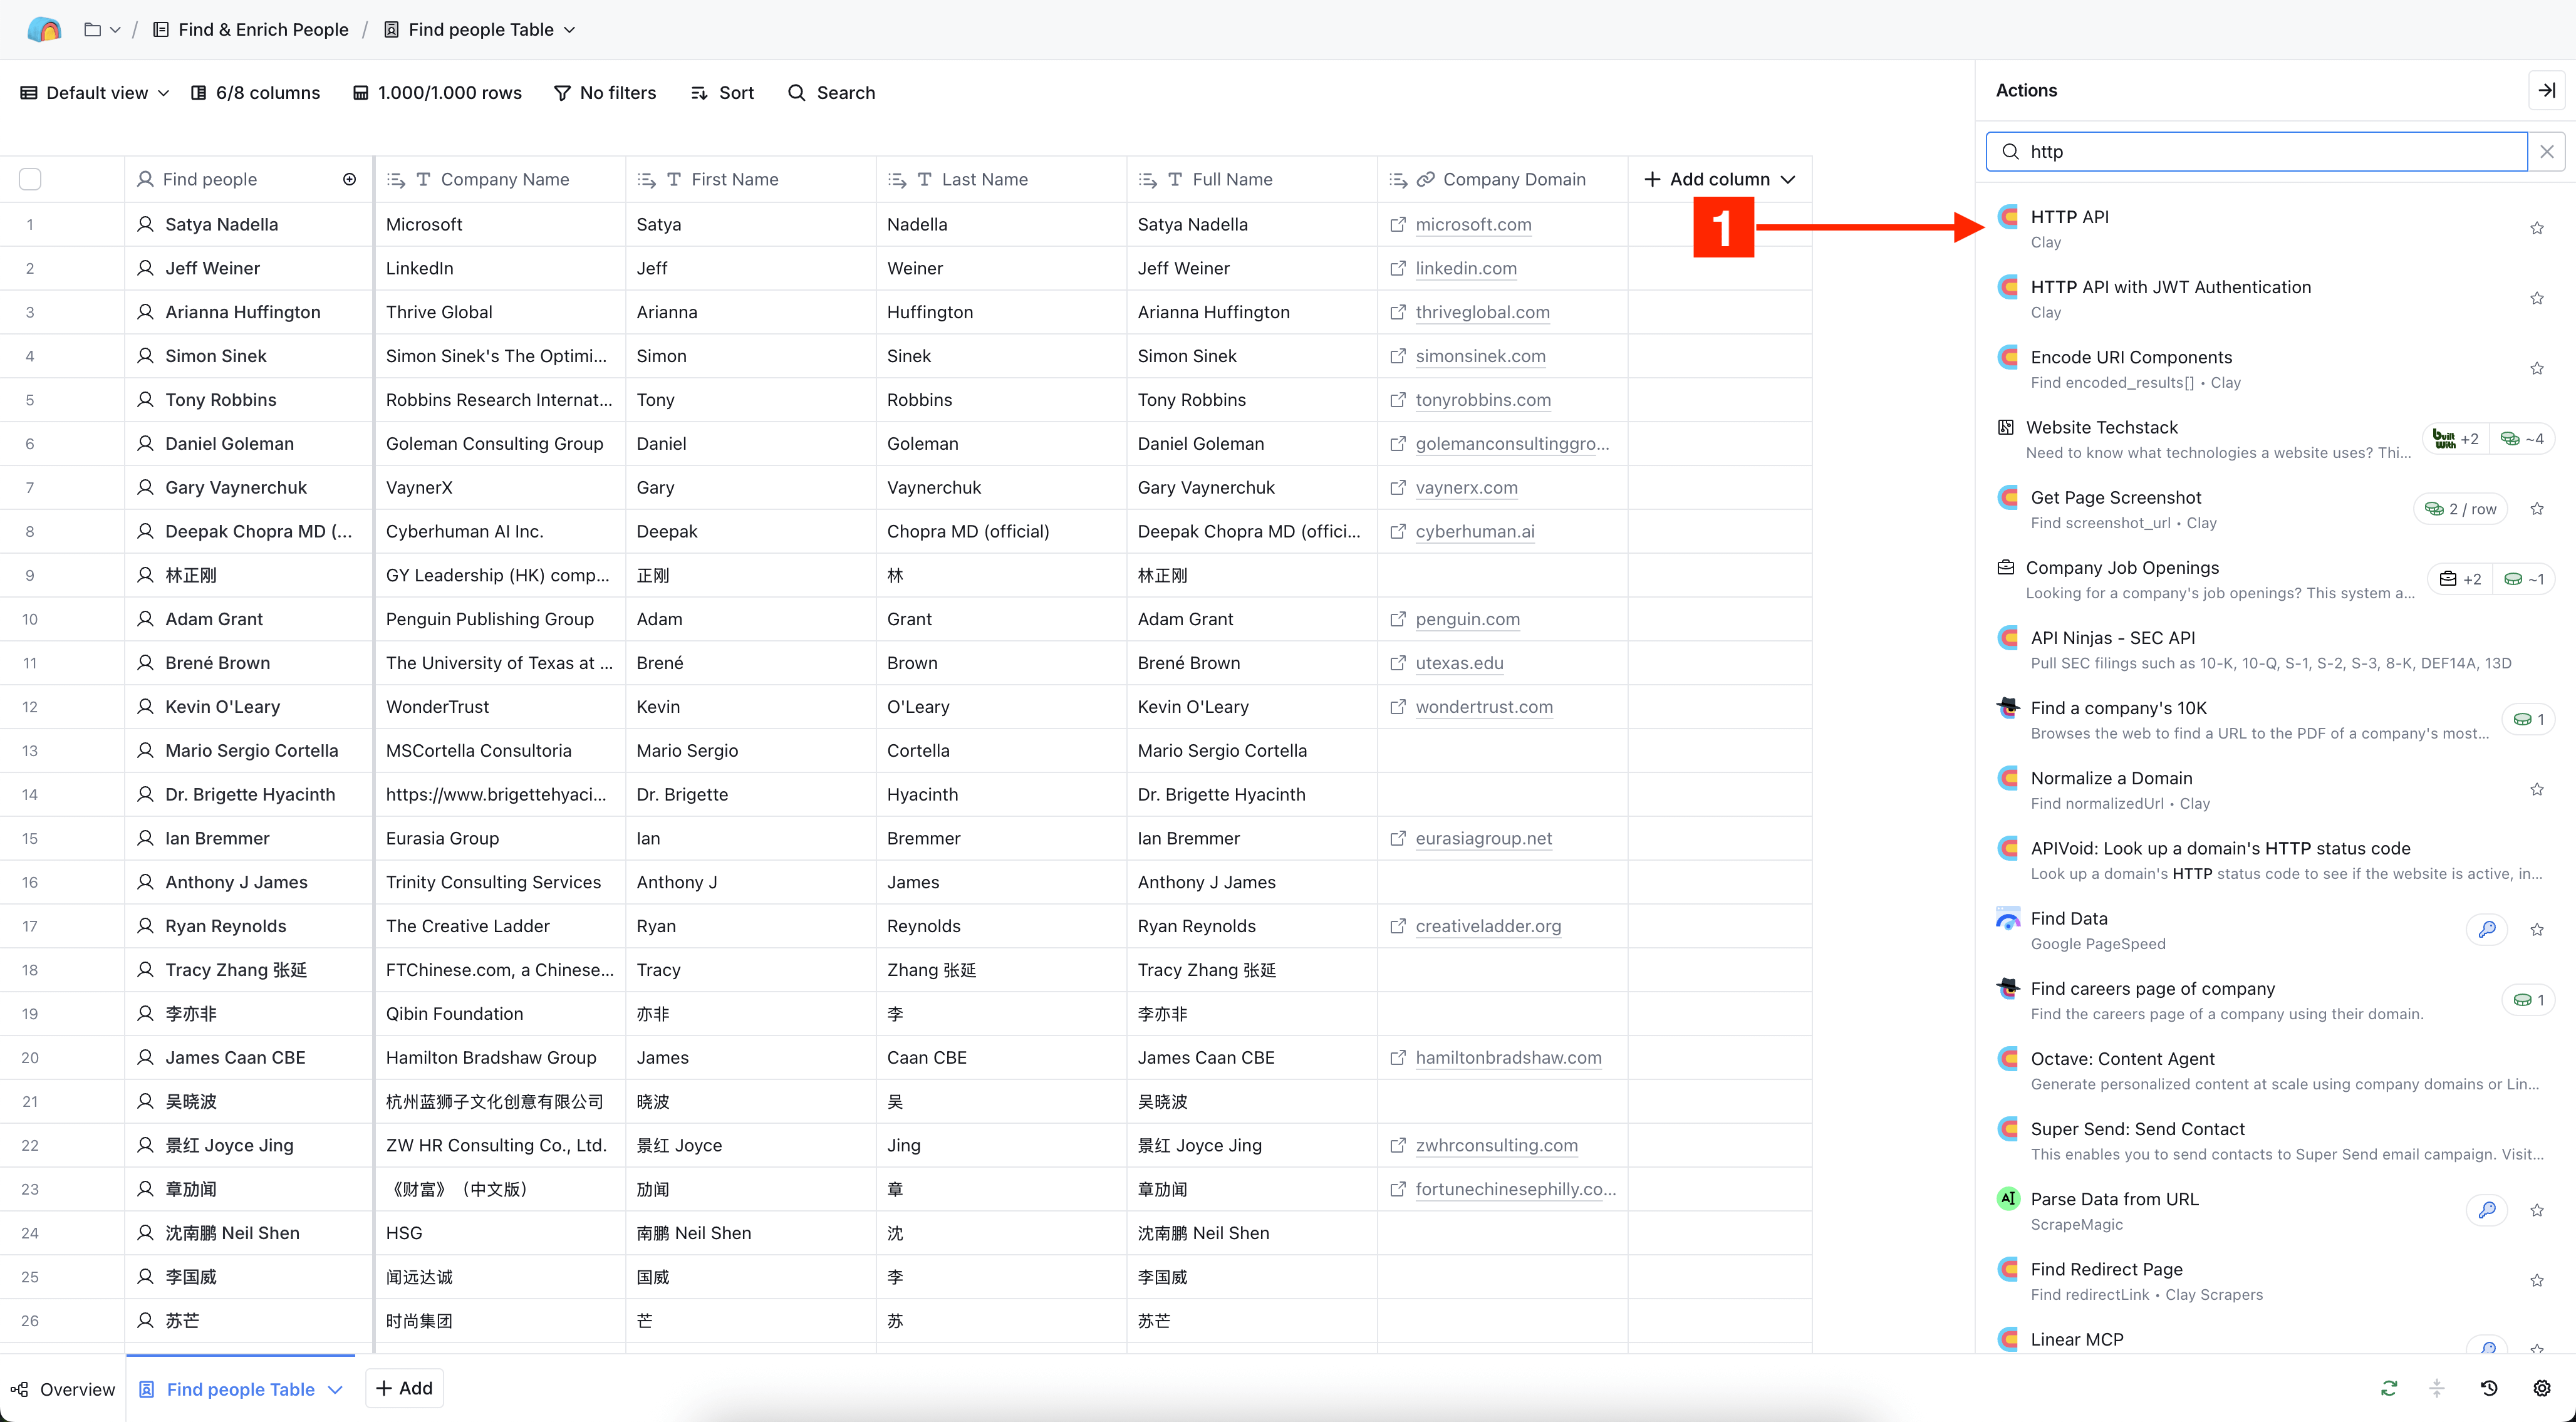
- In the search bar, type "http", then select "HTTP API" from the list. show screenshot
Step 2: Add Your Anymail Finder API Key
- Go to https://newapp.anymailfinder.com/settings/api.
- Click "Get API Key" (if you haven't already), then copy the API key.
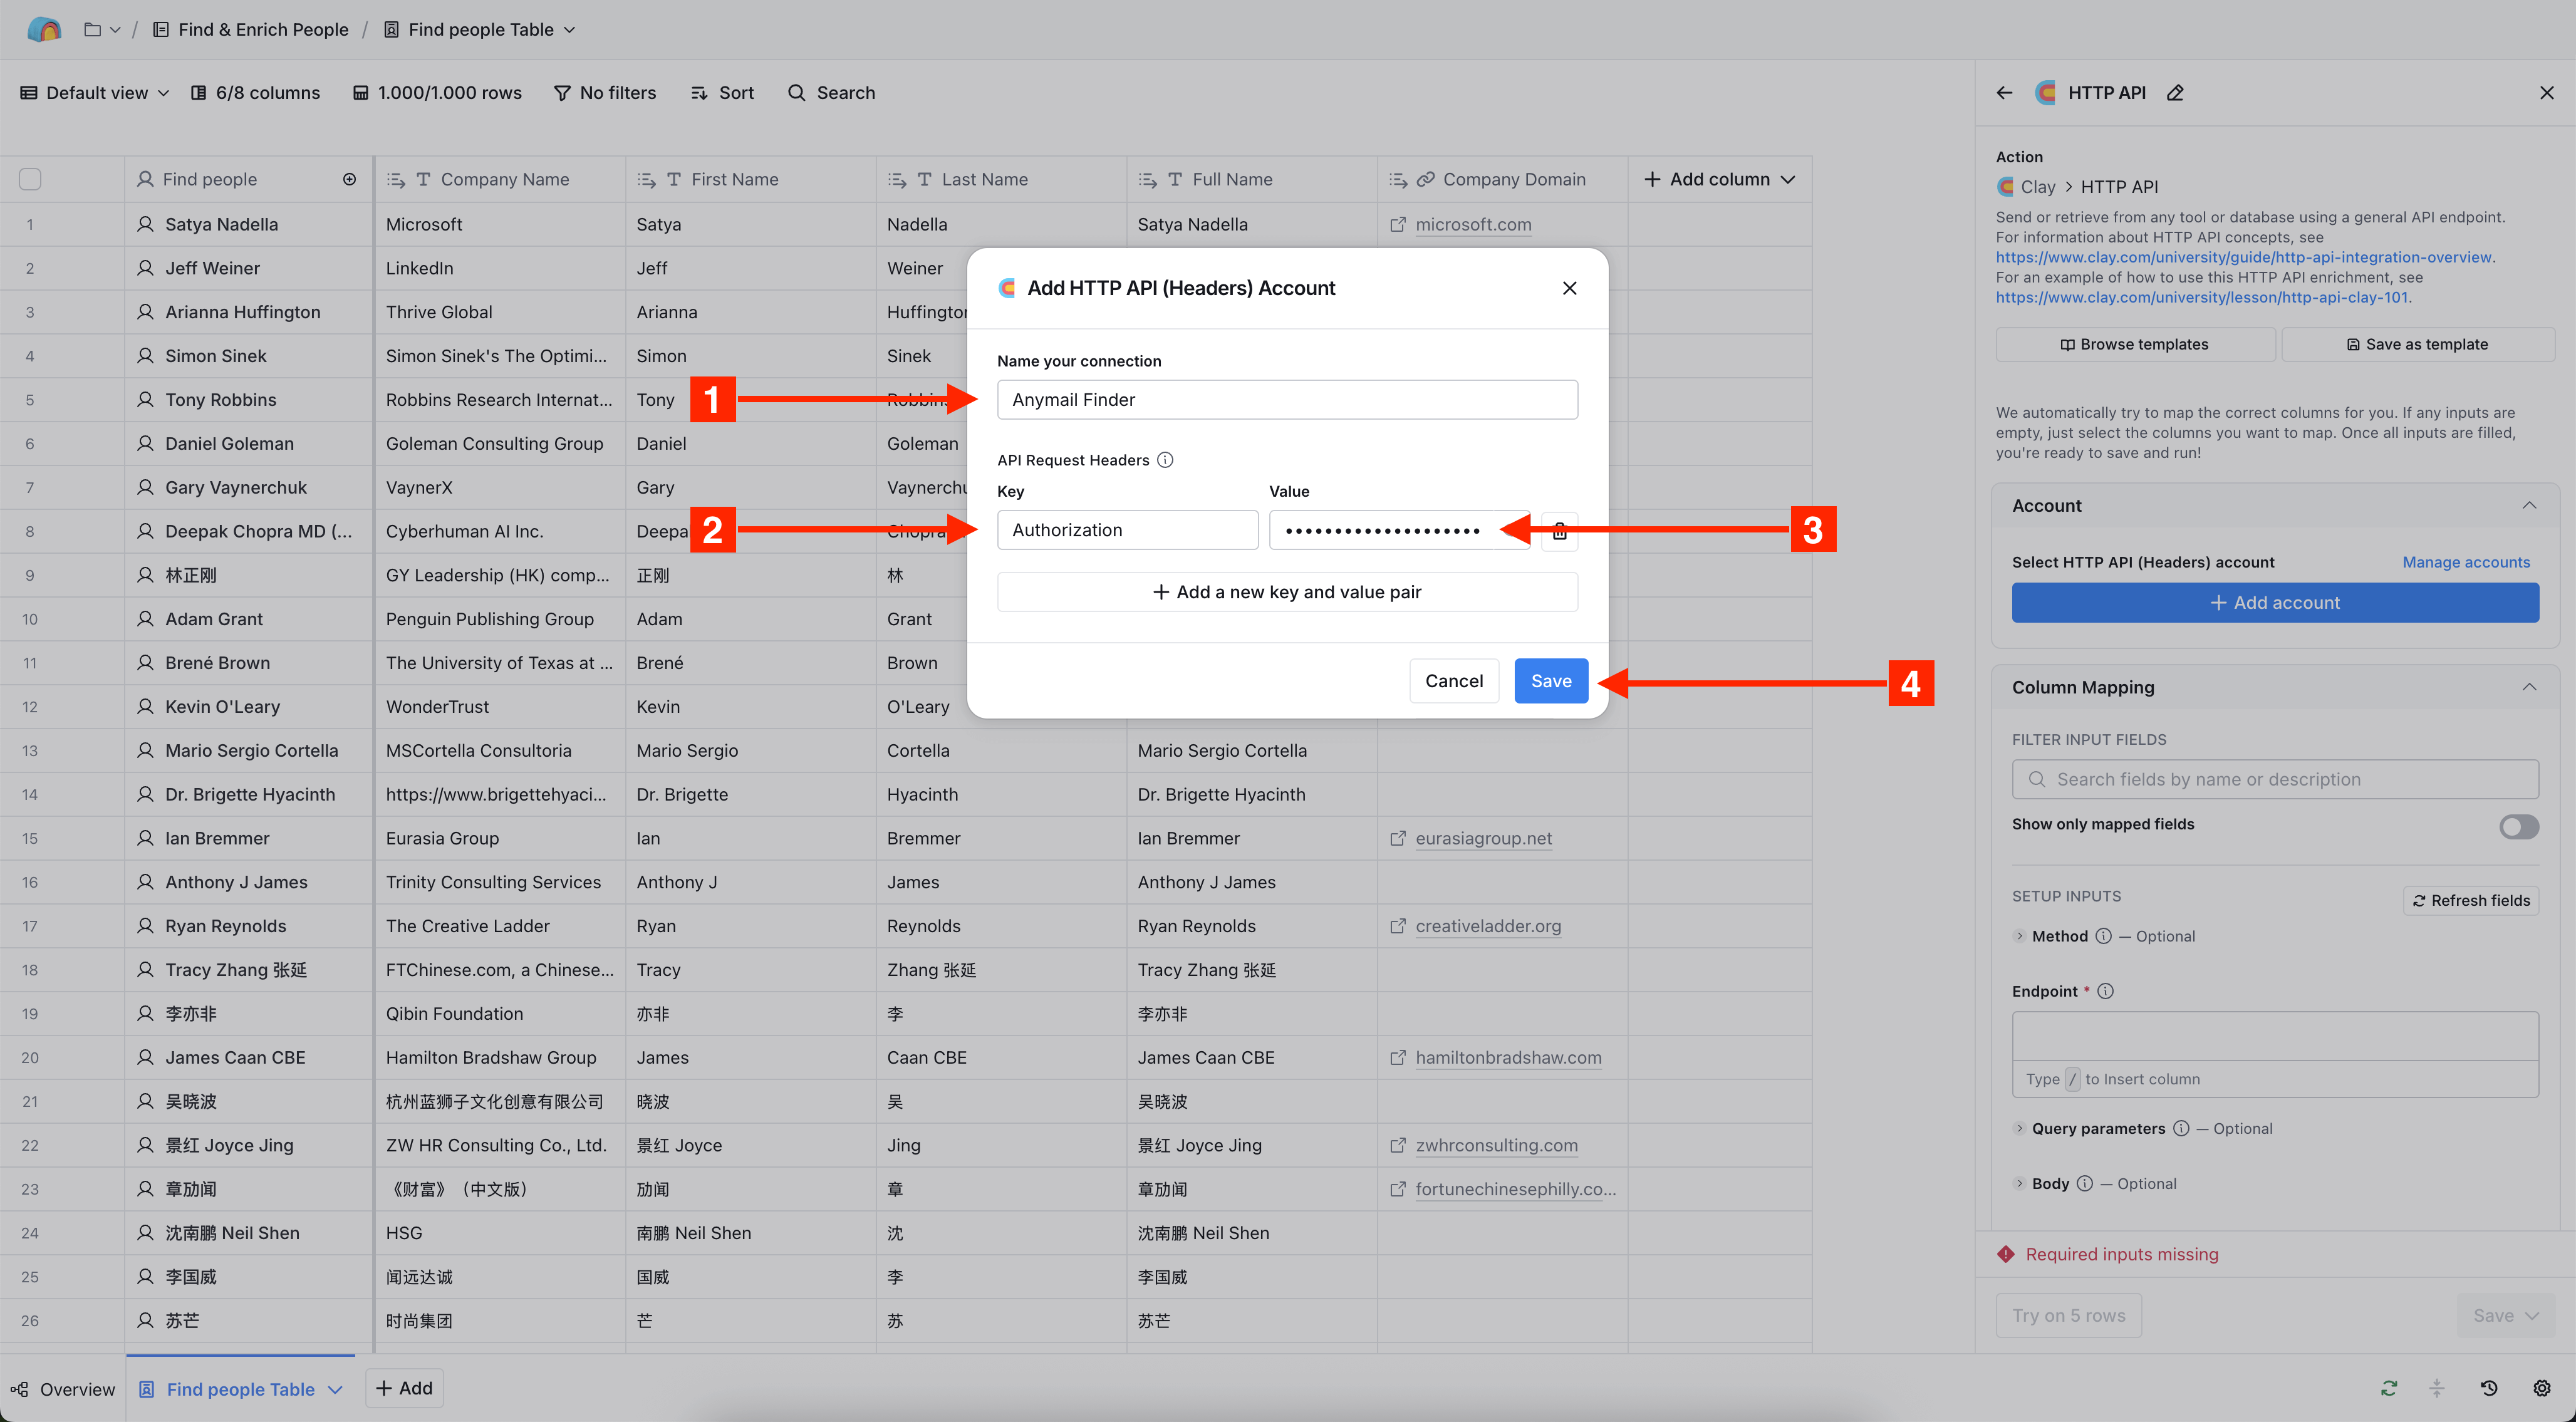
- Back in Clay, click "Add account". show screenshot
- Set the following values: show screenshot
Name your connection: Name the connection (e.g. "Anymail Finder"). Key: Authorization Value: Paste your Anymail Finder API Key - Click "Save".
Step 3: Configure API Inputs
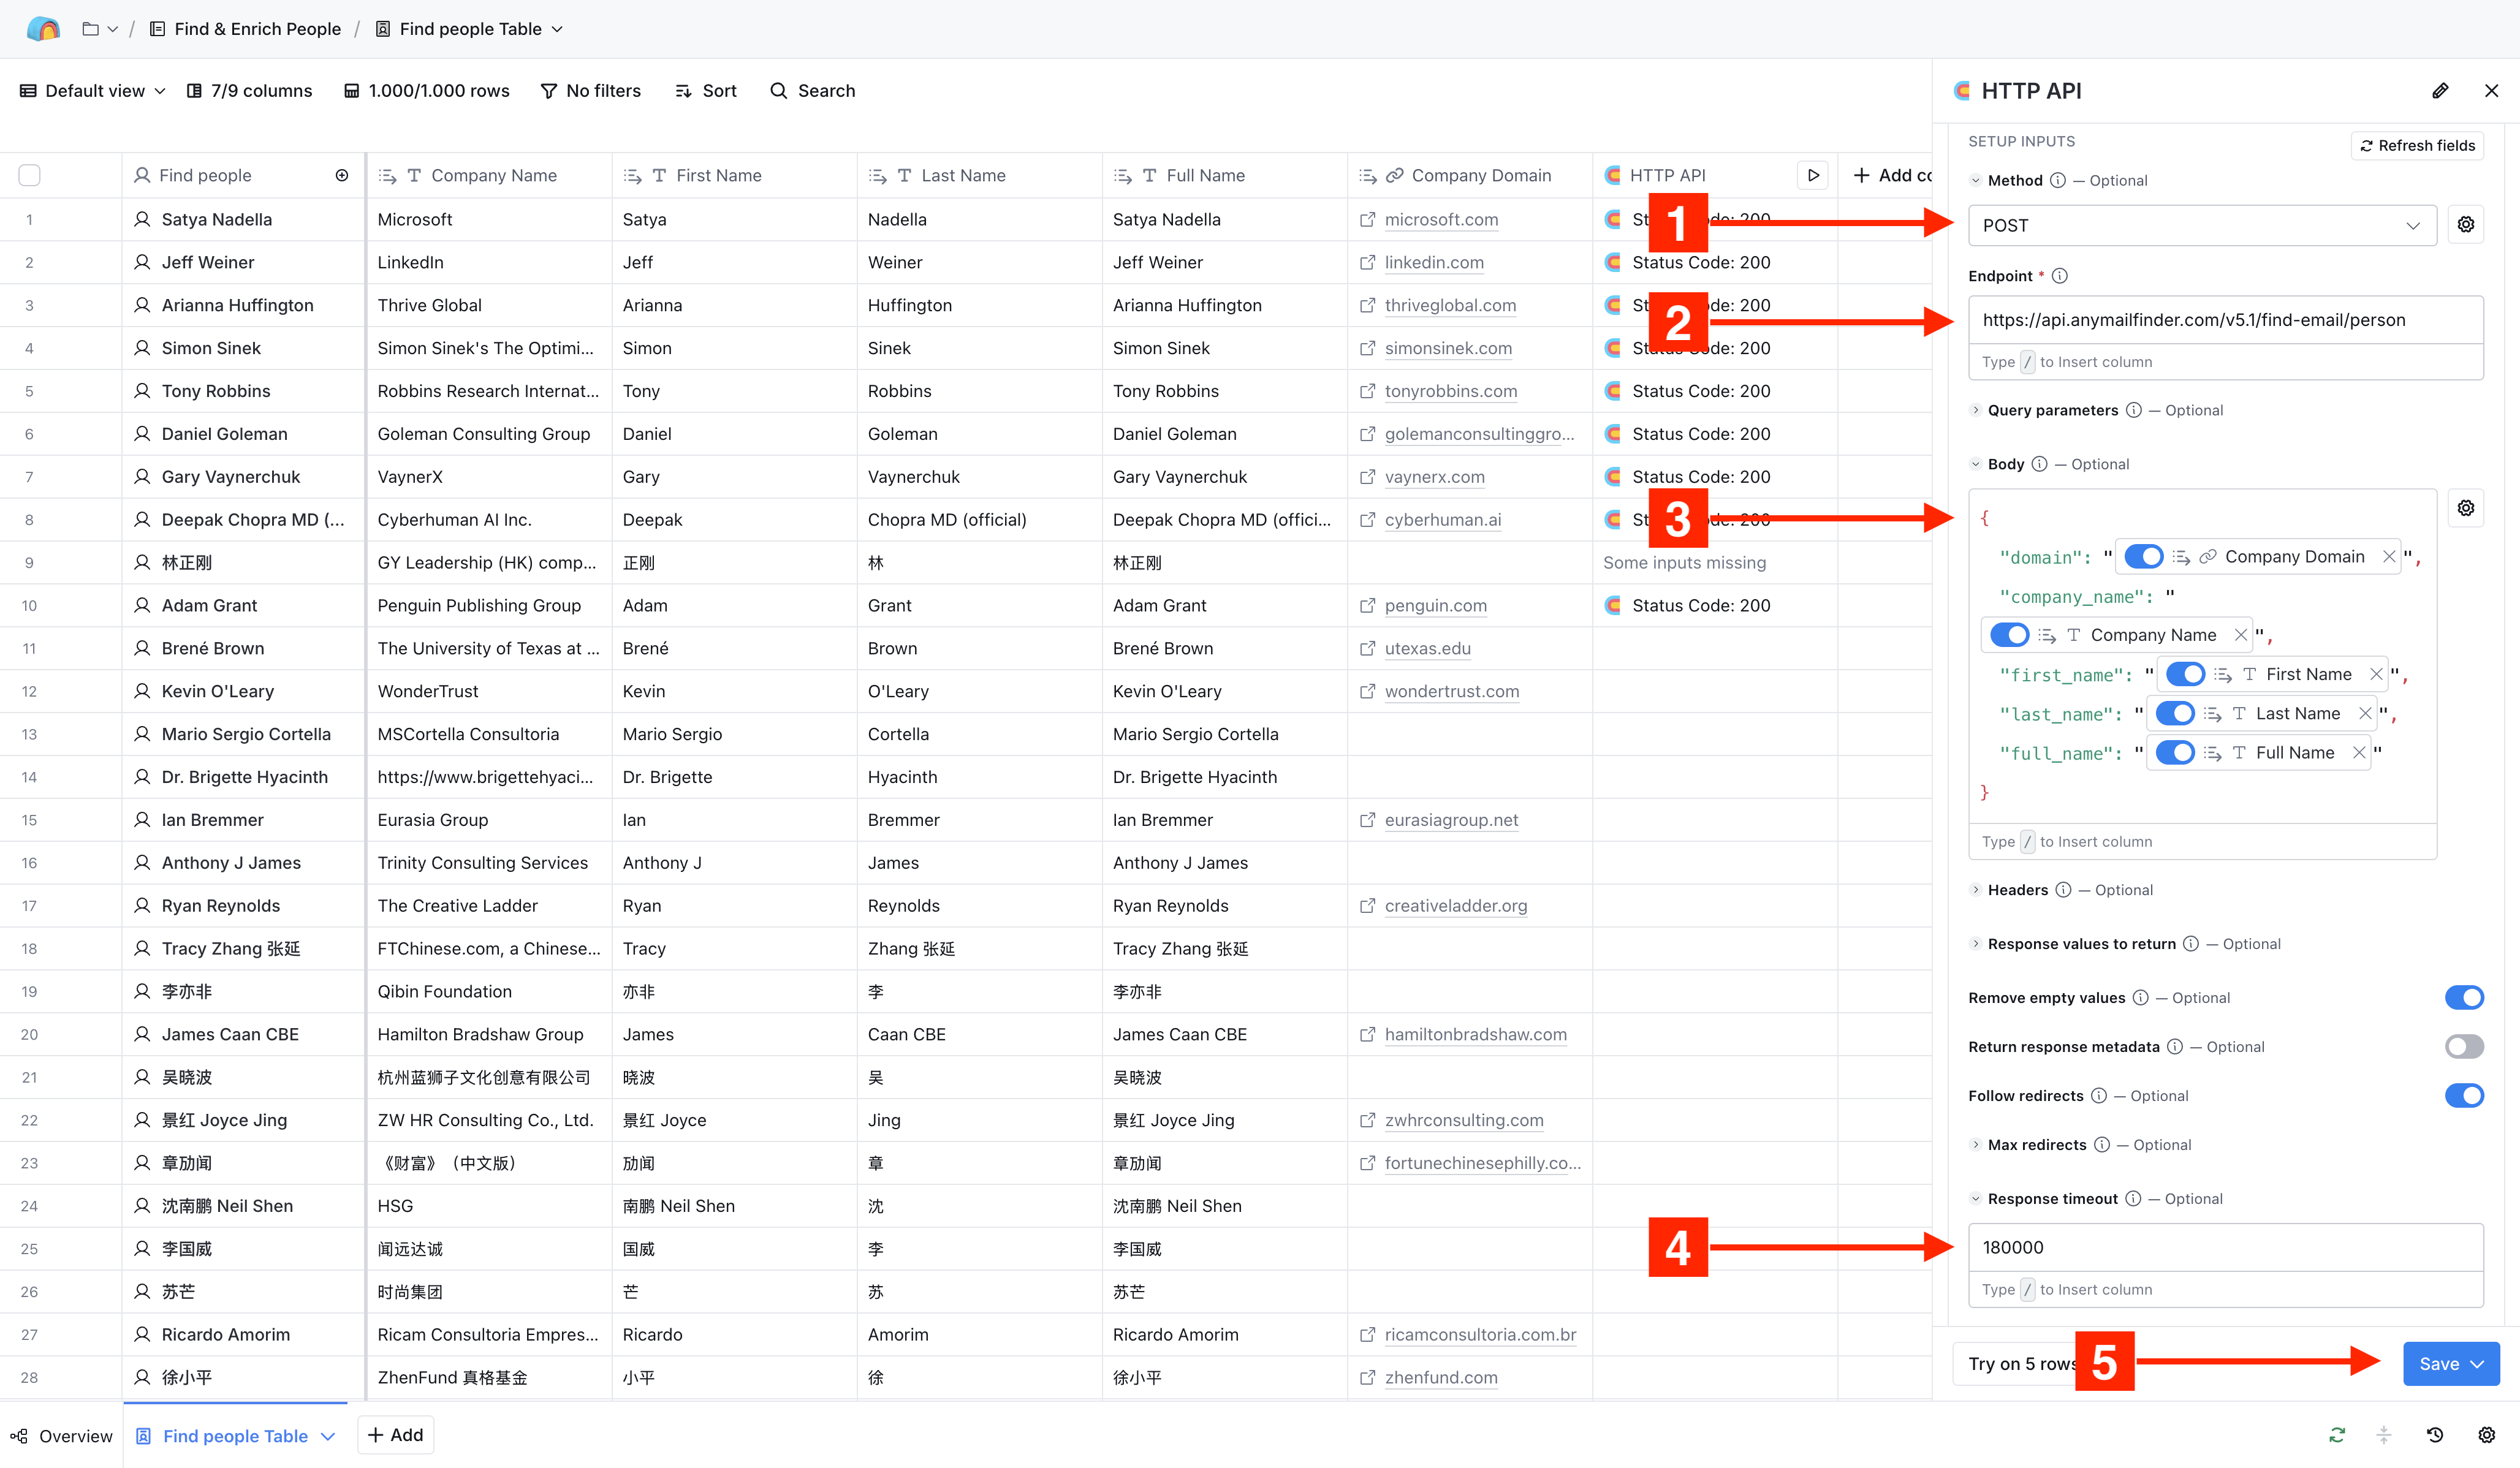
- Set the following values: show screenshot
Method: POST Endpoint: https://api.anymailfinder.com/v5.1/find-email/person Body: Create a valid JSON request using your Clay table columns. Use / to map each field to the relevant column in your table. Here's the format: { "domain": "<column containing Company Domain>", "company_name": "<column containing Company Name>", "first_name": "<column containing First Name>", "last_name": "<column containing Last Name>", "full_name": "<column containing Full Name>" }Response timeout: Set to 180000 (this ensures enough time for processing – 180 seconds). - Click "Save", then "Save and run 10 rows" to test it. Clay will now submit the first 10 rows and attempt to find emails.
Step 4: Create Output Columns
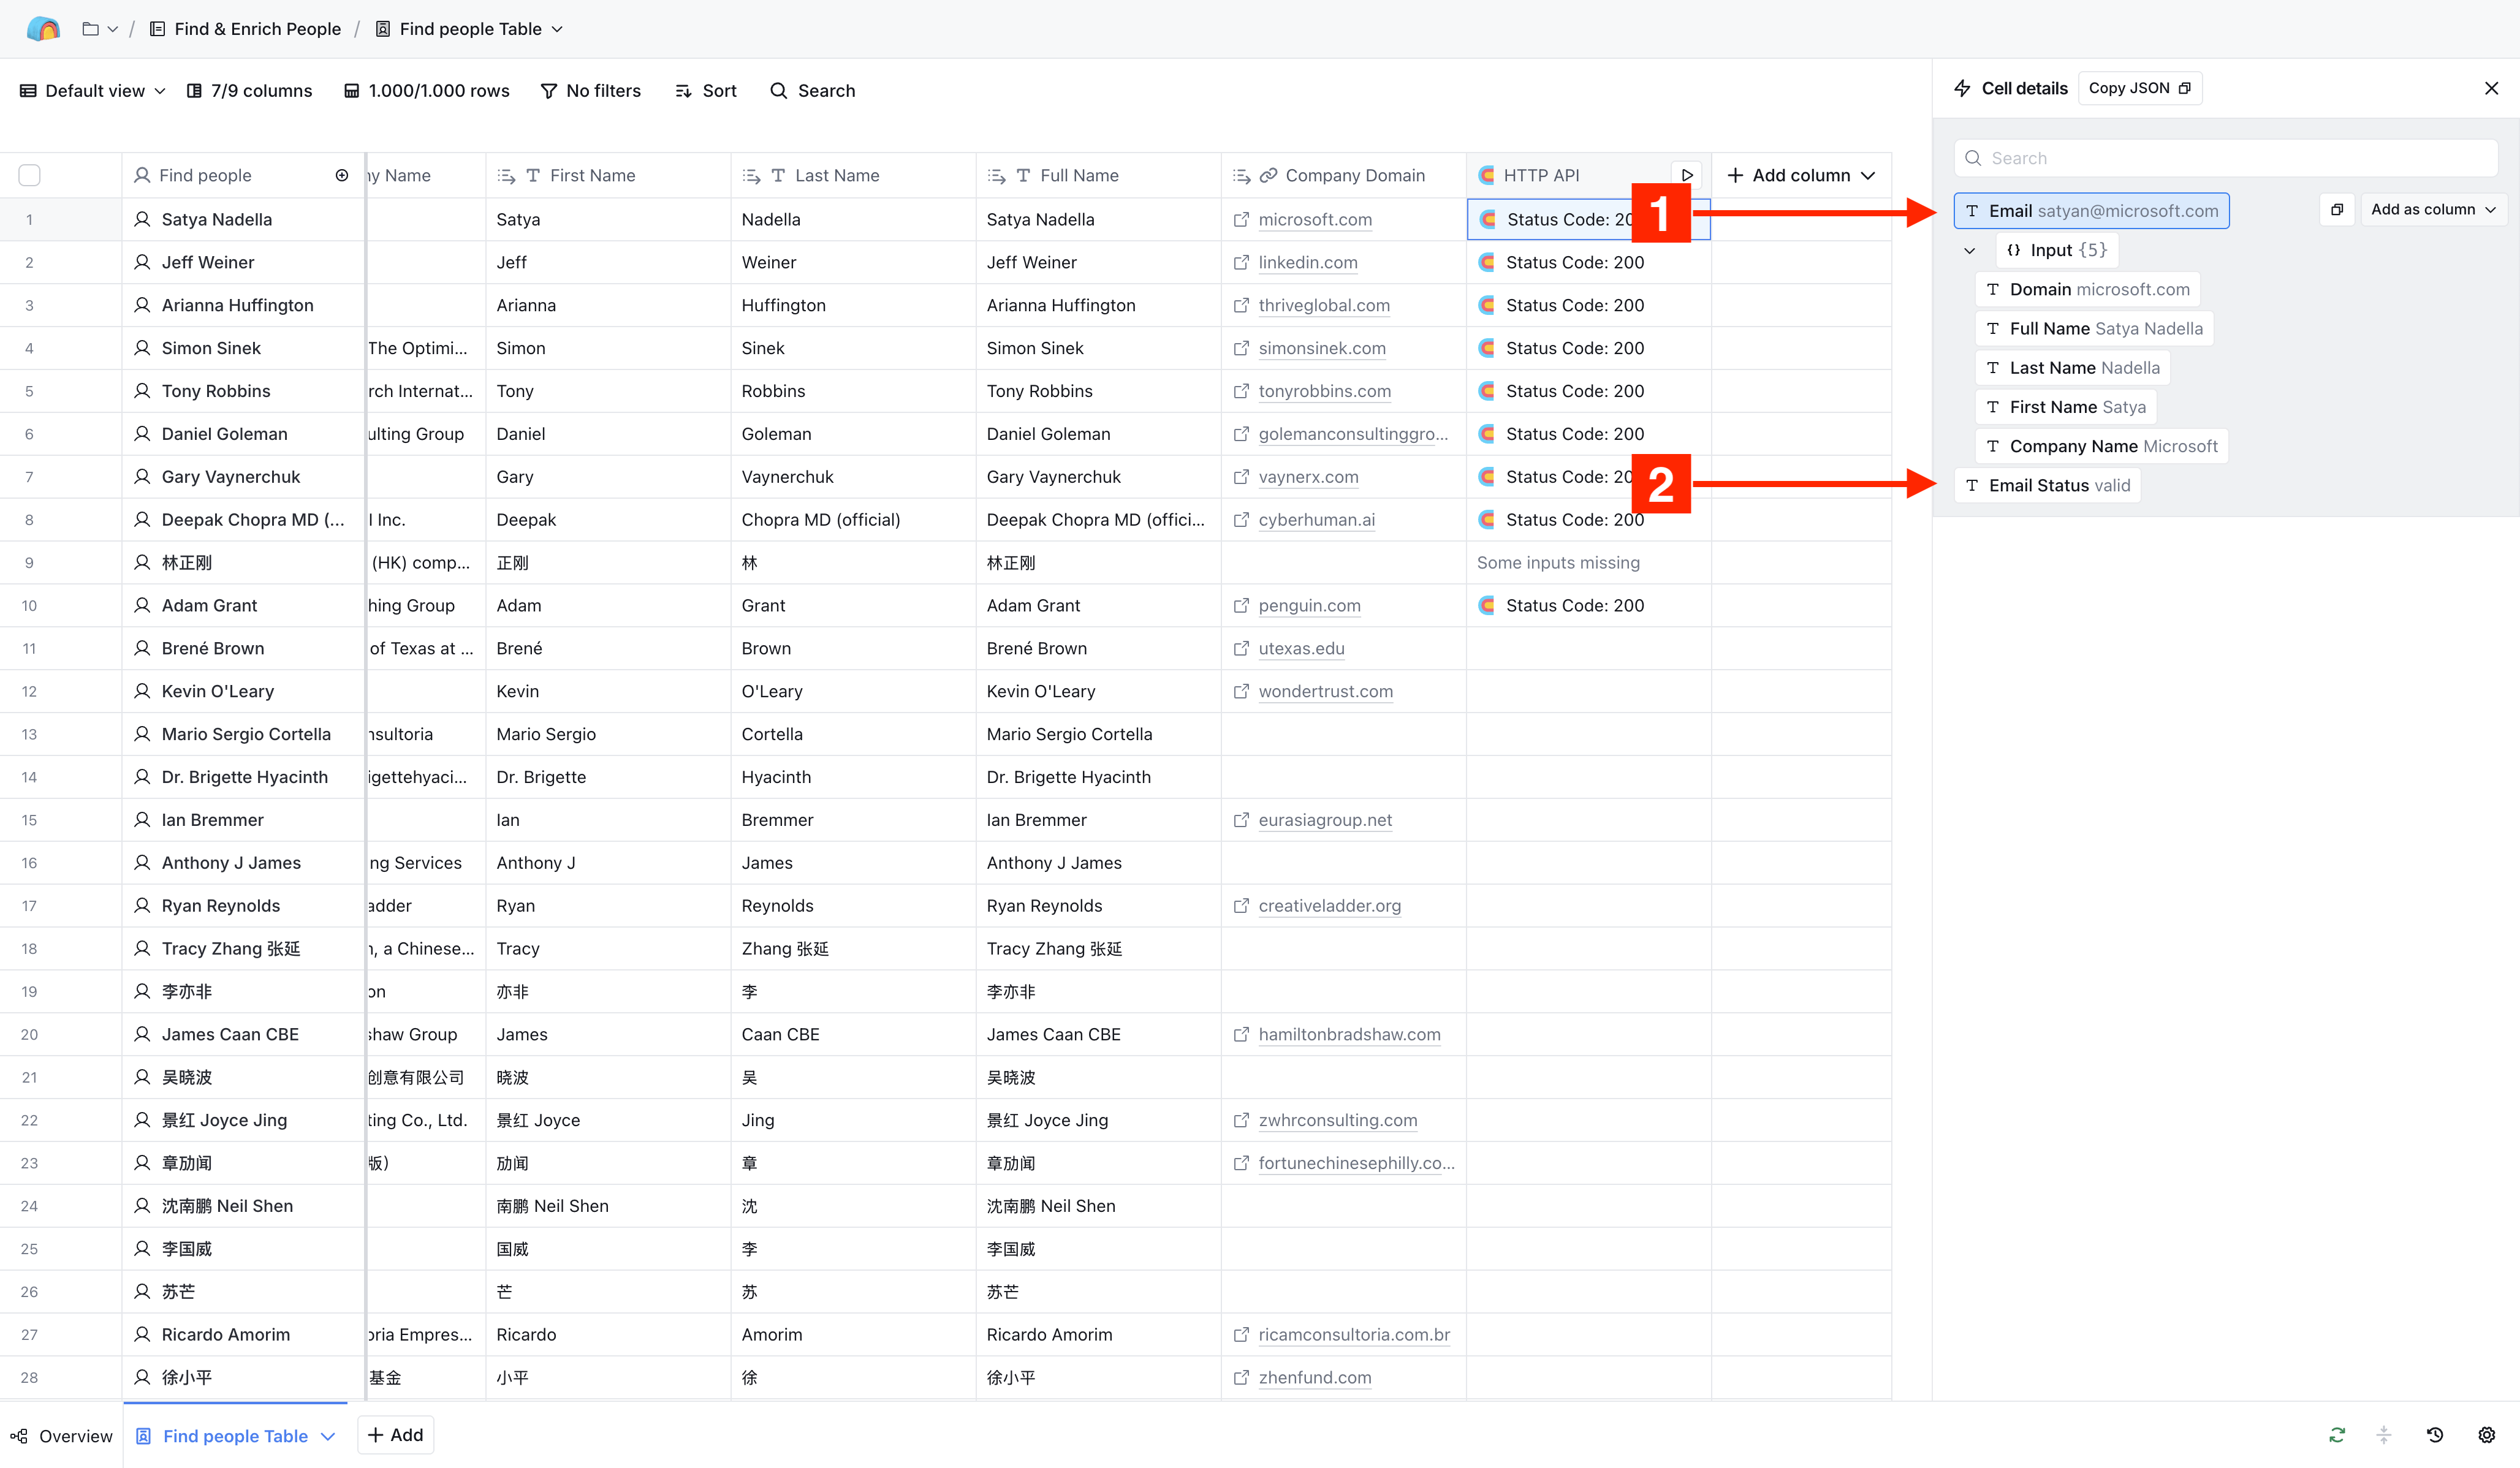
- Once the call runs, you'll see a new column (e.g. "HTTP API") with status codes.
- Click on any cell in this column. Then hover "Email" and click "Add as column". show screenshot
- Repeat the same for "Email Status".
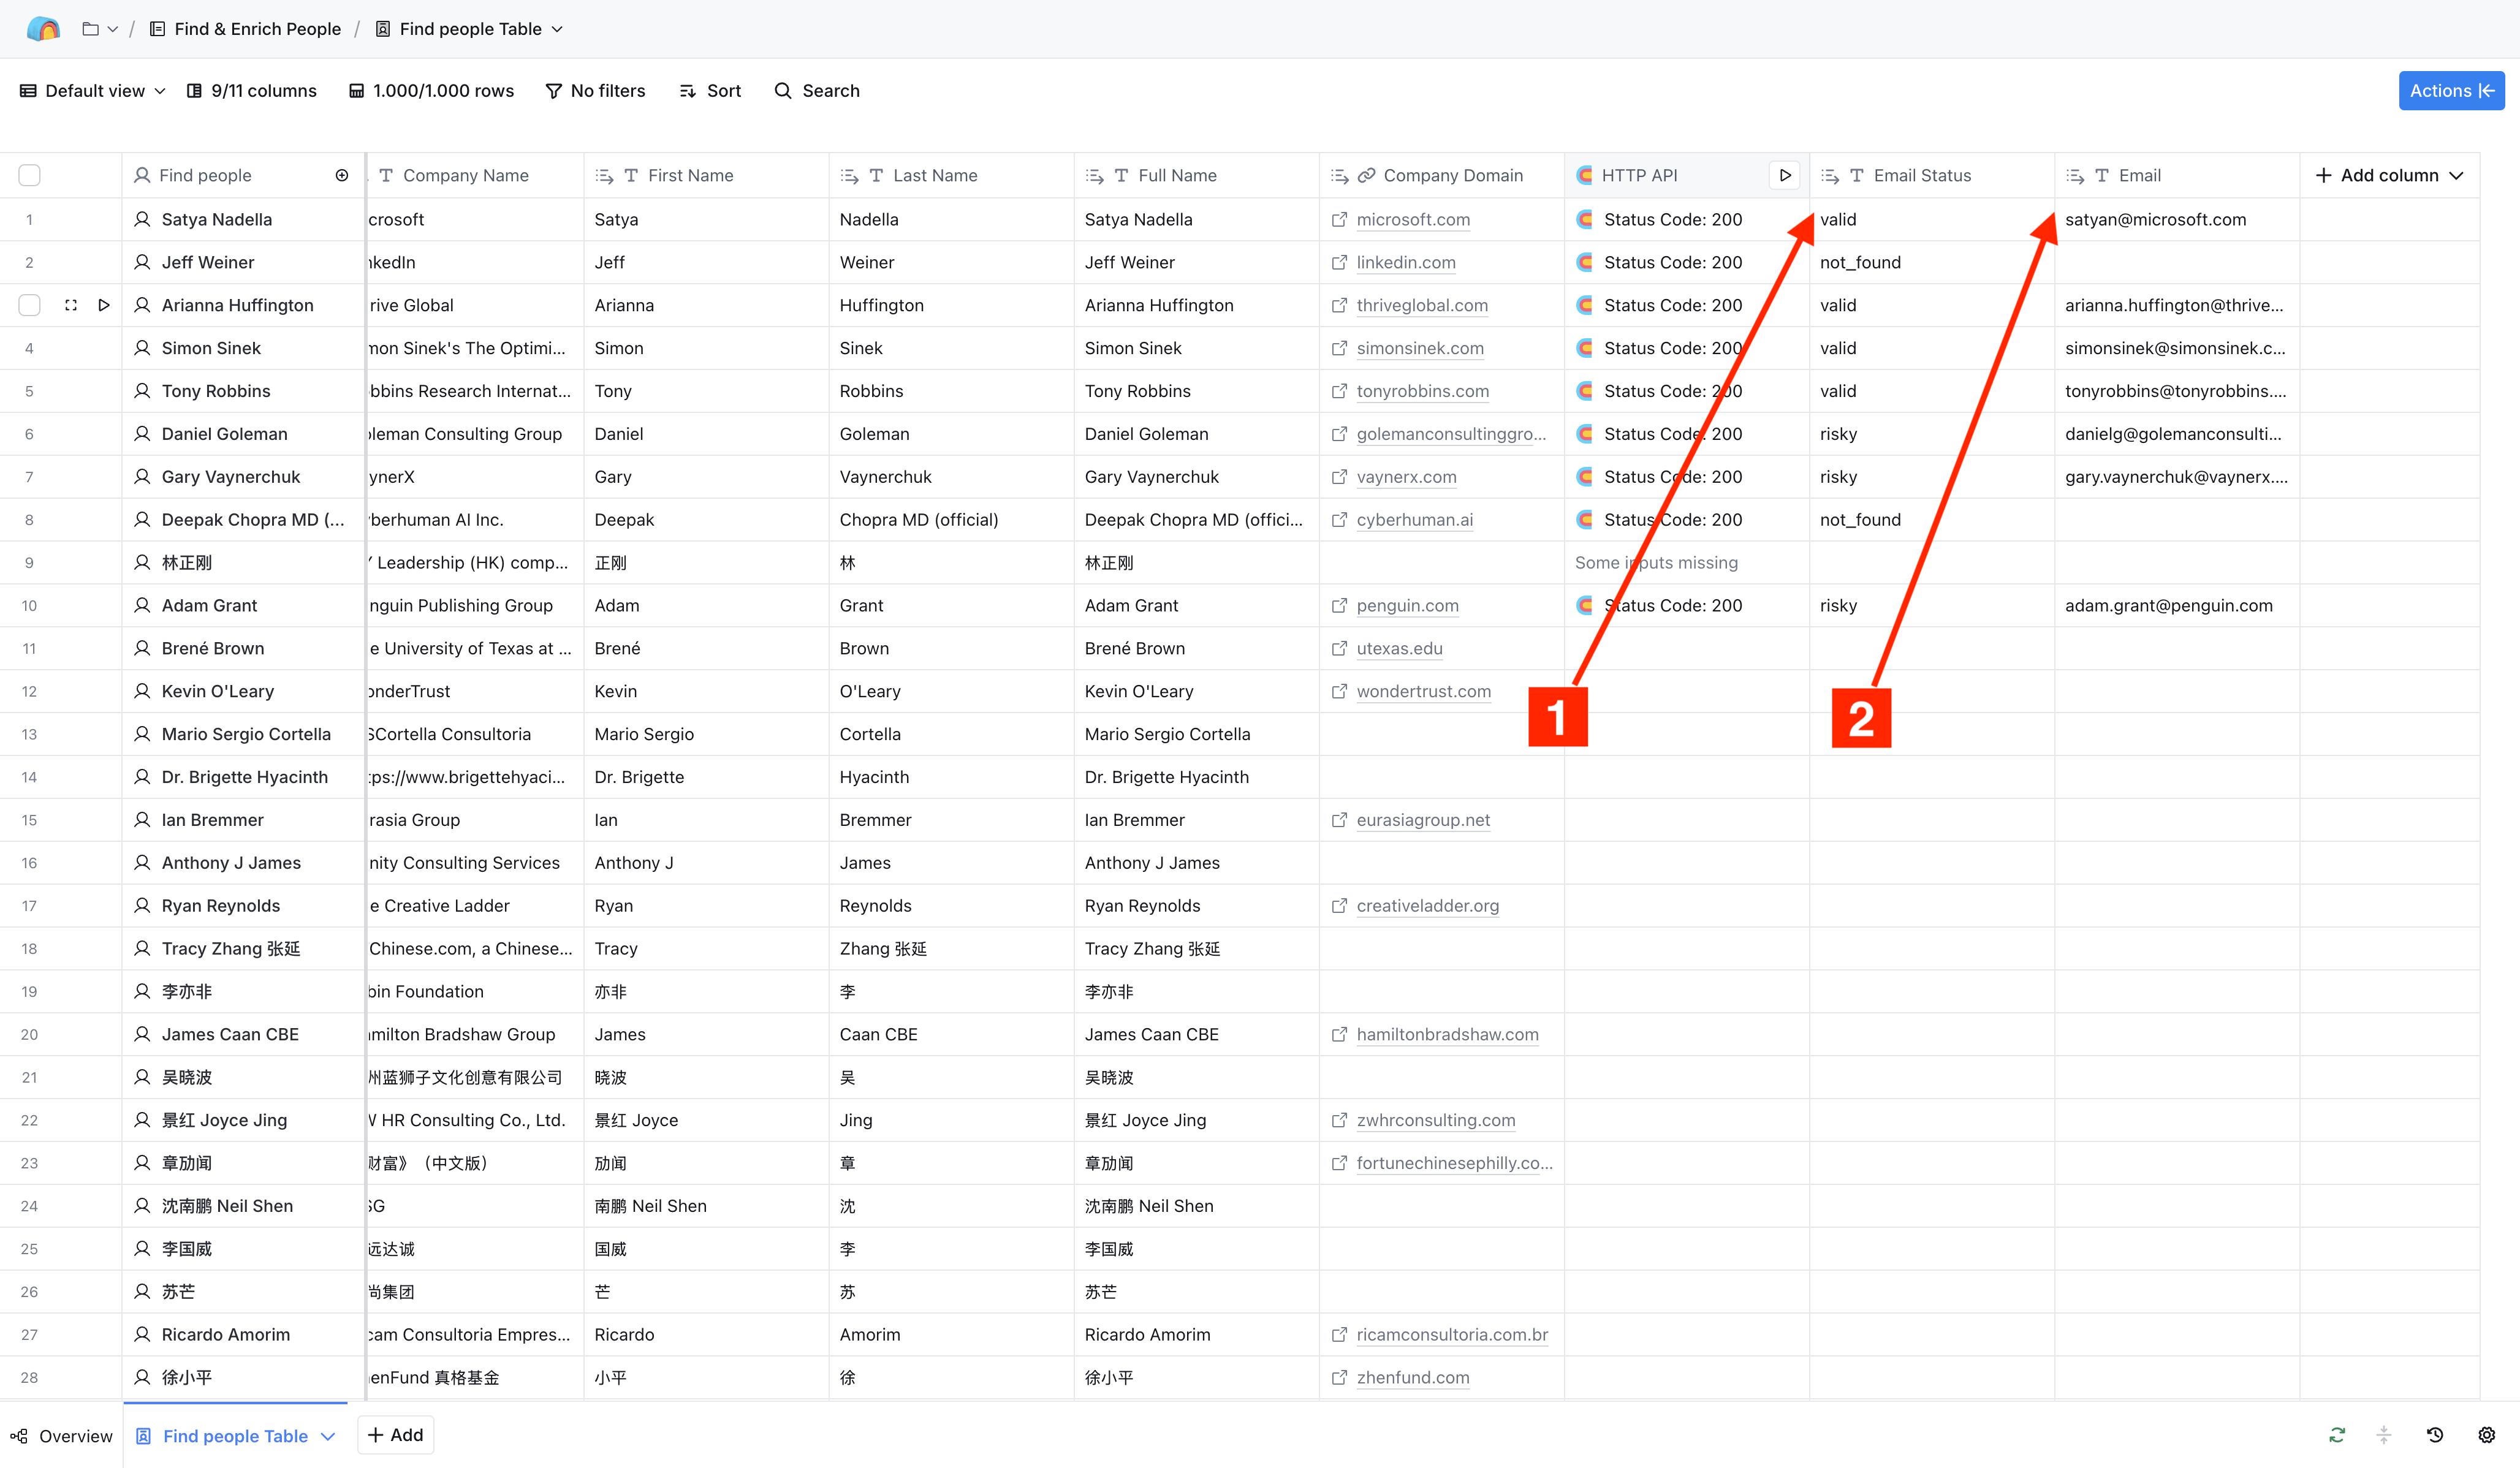
- You'll now see 2 columns added to your table: show screenshot
Email: the email found. Email Status: Possible values are: - valid: Safe to use (97%+ accuracy). You are charged only for these.
- risky: May bounce; use cautiously.
- not_found: No email found. Free of charge.
You're Done!
You've now connected Anymail Finder to Clay - your workflow can automatically find and verify emails based on your own data.
If you run into any issues:
- Check the Anymail Finder API documentation
- Contact the support team via chat or by email at team@anymailfinder.com