Find Emails in your Google Sheet™
Use these formulat to find emails in your Google Sheet™
How to get started
1. Go to the Anymail finder for Google Sheets™ page and click the Get the Add-on button.
2. Click the Install button.
3. Click Allow to give permissions to Anymail finder.
4. Create a new Google Sheet™ file online and open the Anymail finder Add-on. To do this, select the Extensions tab -> Anymail finder -> Open.
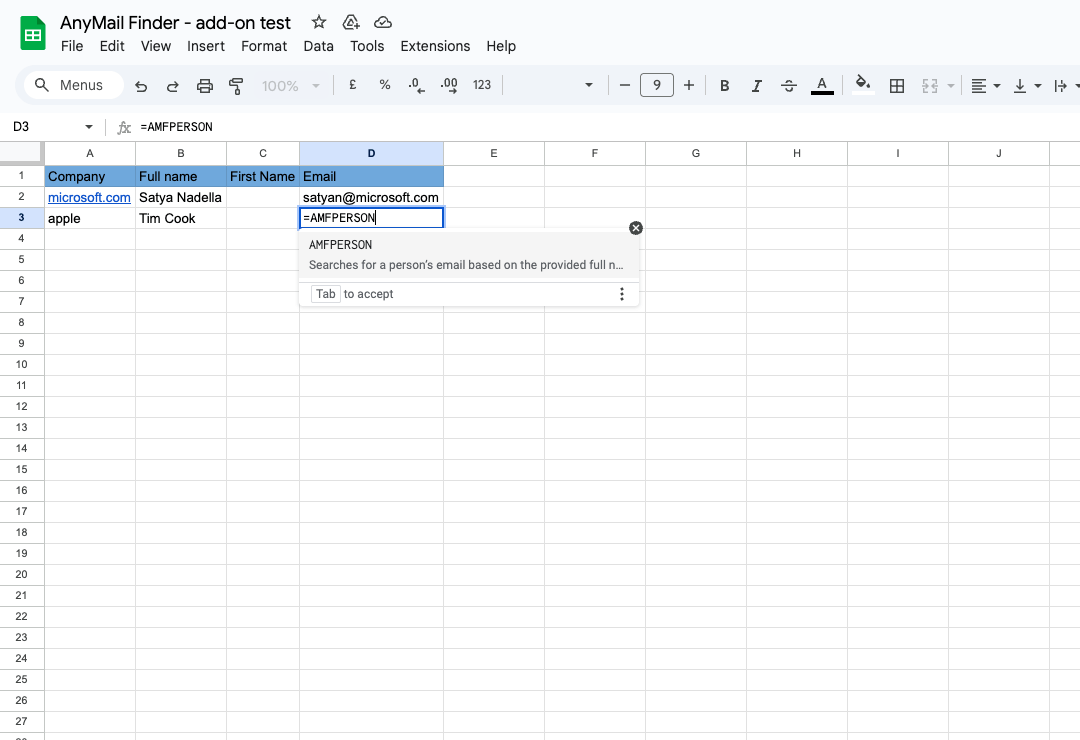
5. Use the available formulas directly in your Google Sheet™.
When performing the first search, the Add-on will ask you to enter your API key to associate the add-on with your Anymail finder account. The API key can be found in the API section of your account.
Why choose Anymail Finder?
Pay only for Verified Emails
These emails pass advanced verification checks and offer a 97%+ delivery rate, so you can confidently use them in your campaigns, ensuring great deliverability and protecting your sender reputation.
- Risky Emails are FREE
- Not found results are FREE
- Duplicate searches within 1 month are FREE
Discover more emails
Our advanced email finder tool analyzes various sources to find the emails you're looking for. All emails are verified before being returned to you, ensuring that you receive reliable and up-to-date information.Integrate seamlessly
Our robust API and bulk support make it easy to integrate Anymail Finder into your workflow and manage large-scale searches efficiently.Get 100 Free Credits
Get 100 free credits and see how easy it is to find verified emails. Explore all the features, including single email searches, Bulk Email Finder, Email Finder API, and the Browser Extension. No charge unless you subscribe to a plan. "Best Email Finding tool ever"
Awesome experience with everything actually.
I like all of it's features. The ease of use of their UI, very helpful staff and also their features are just awesome. I couldn't think of anything not great about this product.
Cedris M. - Founder and CEO